


Once the menu is planned, it’s time to set a pretty Thanksgiving table or two.
Let the kids help, for a fun family time that will put a little extra gratitude in all of your hearts this holiday!
Kids’ Table Runner
Tools and materials: Pencil; paintbrush; scissors; Finish Factor 28-inch contractor’s paper; Elmer's 4-ounce Glue-All; Valspar paint samples in Mac and Cheese (#CI 223) and Cherry on Top (#CI 229)
Step 1: Download these leaf templates. Trace the leaf outlines onto contractor’s paper and cut them out. Hint: Folding the paper first will allow you to cut out several leaves at once!
You'll need enough leaves to scatter two lines of them down the length of the runner, plus additional leaves for the napkin rings.
Step 2: Paint half of the leaves with a fall color of your choice, and then paint the other leaves with a different fall color. Let the tops of the leaves dry before painting the bottoms.
Step 3: While the leaves dry, create the paper runner. Trim the contractor’s paper so it’s slightly narrower than your table’s width and extends about 8 inches over both ends of your table.
Step 4: Glue two lines of leaves down the length of the runner. Note: This cover is intended to be disposable, so don’t worry when things get a little messy on Thanksgiving Day! You can tape any remaining leaves onto napkin rings at each place setting.

Turkey Placemat
Step 1: Download this turkey template. Trace the outline on the cork shelf liner. Hint: One roll of cork is large enough to trace the turkey four times, so you can have four matching placemats!
Step 2: Cut out the design. Now you’re good to gobble!
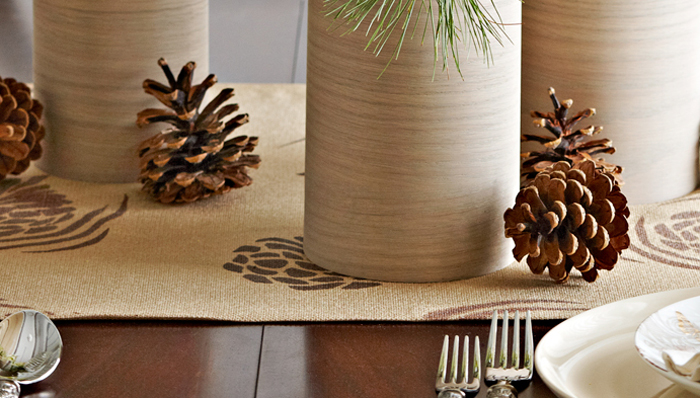
Grown-Ups Table Runner
Tools and materials: Utility knife; painter’s tape; transfer or graphite paper; table runner; 5 foot by 20 inch almond shelf liner; Rust-Oleum universal spray paint
Step 1: Lay the table runner on a flat work surface and cut a piece of shelf liner long enough to cover the runner from end to end. Hint: The shelf liner used is 20 inches wide. If your table runner is wider than that, cut two lengths of shelf liner and tape the long edges together.
Step 2: Print out the pattern of your choice.
Step 3: Place transfer paper beneath the pattern and place both on the shelf liner. Trace the stencil pattern onto the shelf liner, and go over the lines with a permanent marker to make them easier to see. Repeat the pattern in different places and orientations along the shelf liner as desired; allow some of the patterns to overlap the edges of the shelf liner.
Step 4: Use a utility knife to cut out the patterns in the shelf liner.
Step 5: Lay the shelf liner stencil over the table runner. Starting at one end, peel off the backing to stick the liner to the fabric. Gradually remove the backing and press the liner firmly against the table runner so there are no loose sections, especially around the stencil patterns.
Step 6: Mask off any exposed areas of the table runner. If you’re painting more than one color, as on the leaves and pinecones, mask off the stencils you’ll paint with the second color. Spray each exposed pattern with two coats of the first color and let dry. Switch the masking tape to cover the painted portions and apply two coats of the second color.
Hint: Work on a flat surface outdoors with just enough breeze to carry away the paint fumes.
Step 7: After the paint dries to the touch, peel off the shelf liner.
Project information courtesy of Lowe’s Home Improvement, lowes.com